This guide helps new studio members get set up on CO‑architecture by walking through the essential steps for building a complete business profile, managing team access, and uploading projects that showcase your work. It’s designed to give you a clear, confident start so your studio can make the most of the platform from the beginning.
Accessing the Admin Dashboard
The admin dashboard provides a snapshot of your studio’s activity, including opportunities, featured content, and job slots.
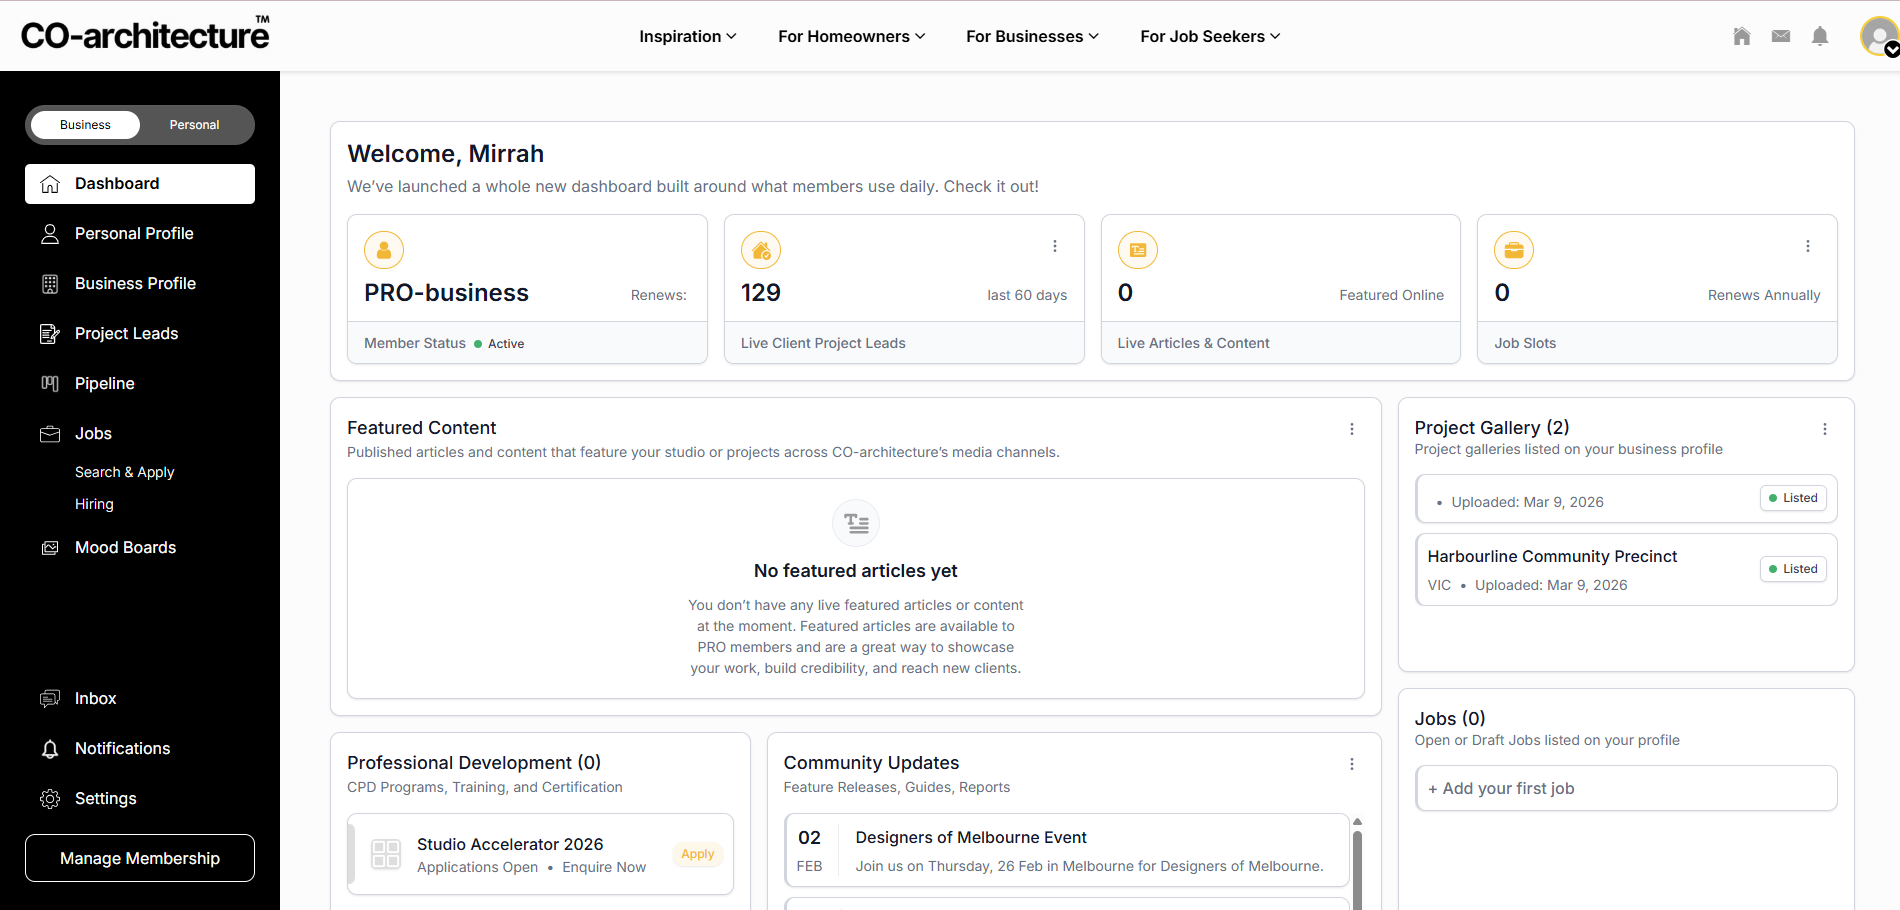
In your dashboard, you will be able to find your:
- Pro Business status
- Opportunities and leads
- Featured content and articles
- Job slots
- Quick access to your business listing and projects.
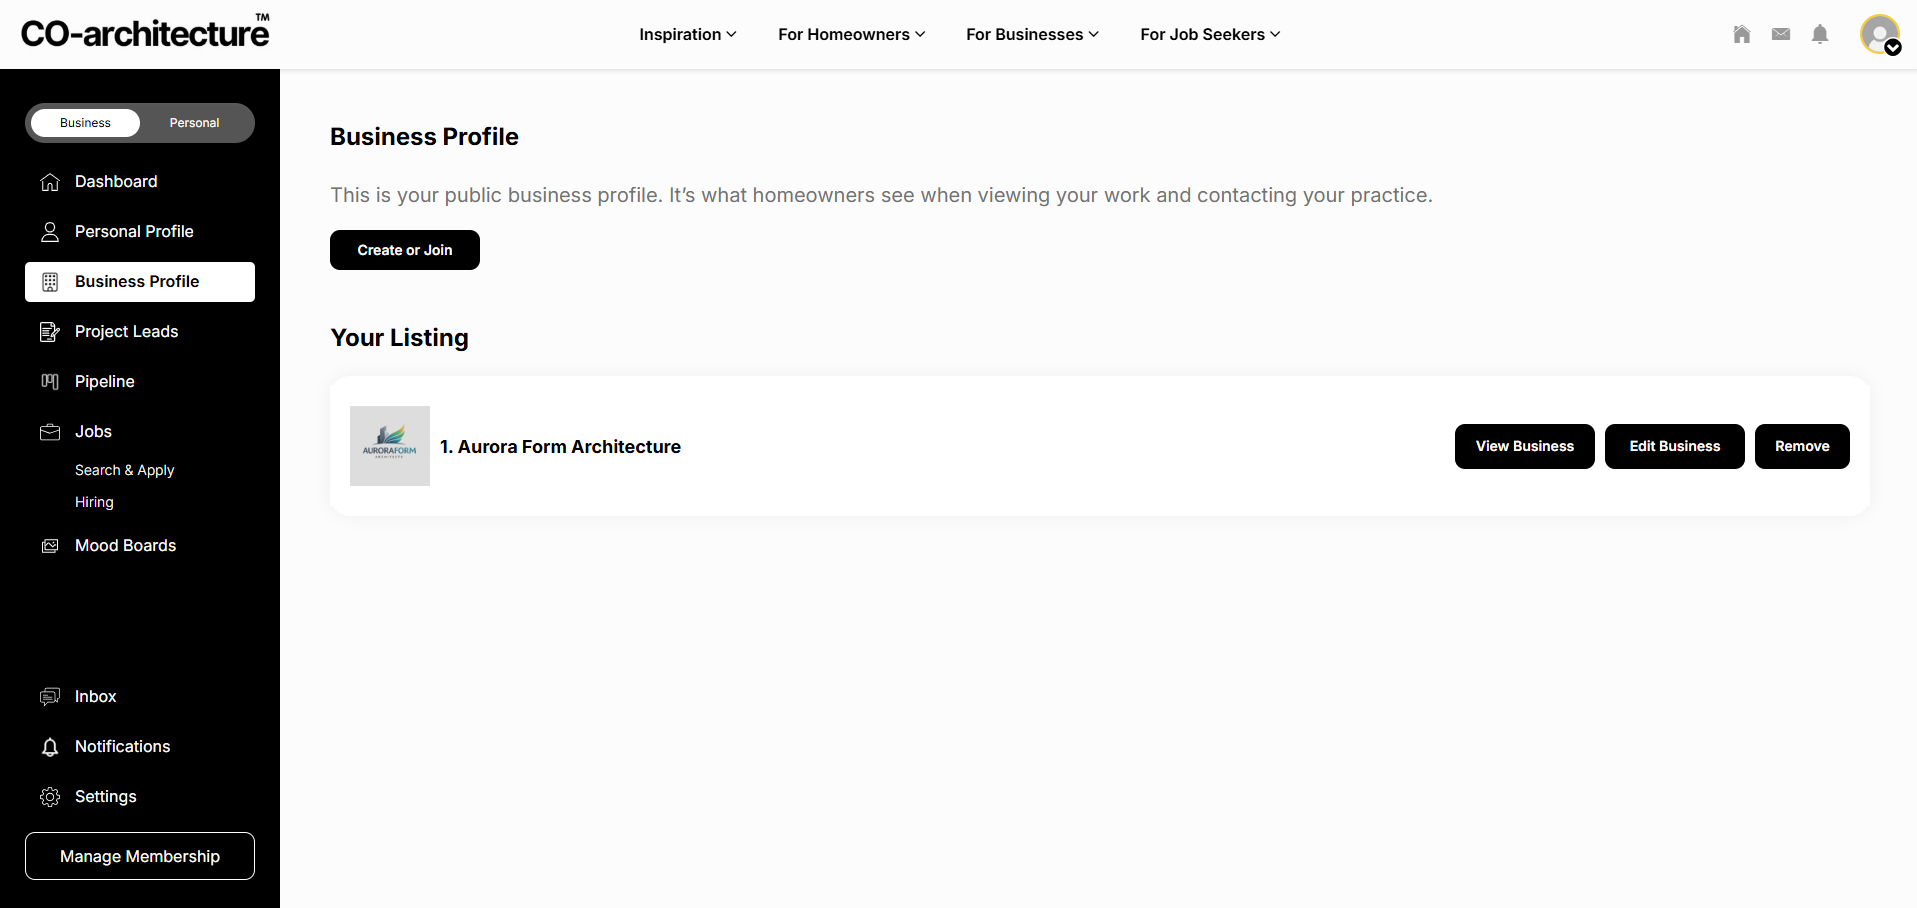
Adding or Editing Your Business Listing
This section walks through how to update your business name, contact info, services, and branding to keep your listing accurate and professional.
Navigation
If you are new and setting up a business profile:
Go to Left Menu → Business Listing → Create or Join
If you already have a profile and need to edit:
Go to Left Menu → Business Listing → Edit Listing
Toggling Between Live View & Edit Mode
- Click the toggle on the top right-hand corner to switch between live view and edit mode

Branding

- Click the logo icon on the left side to add or edit a logo.
- Upload a 500×500px logo for best clarity.
- Larger files are automatically compressed.
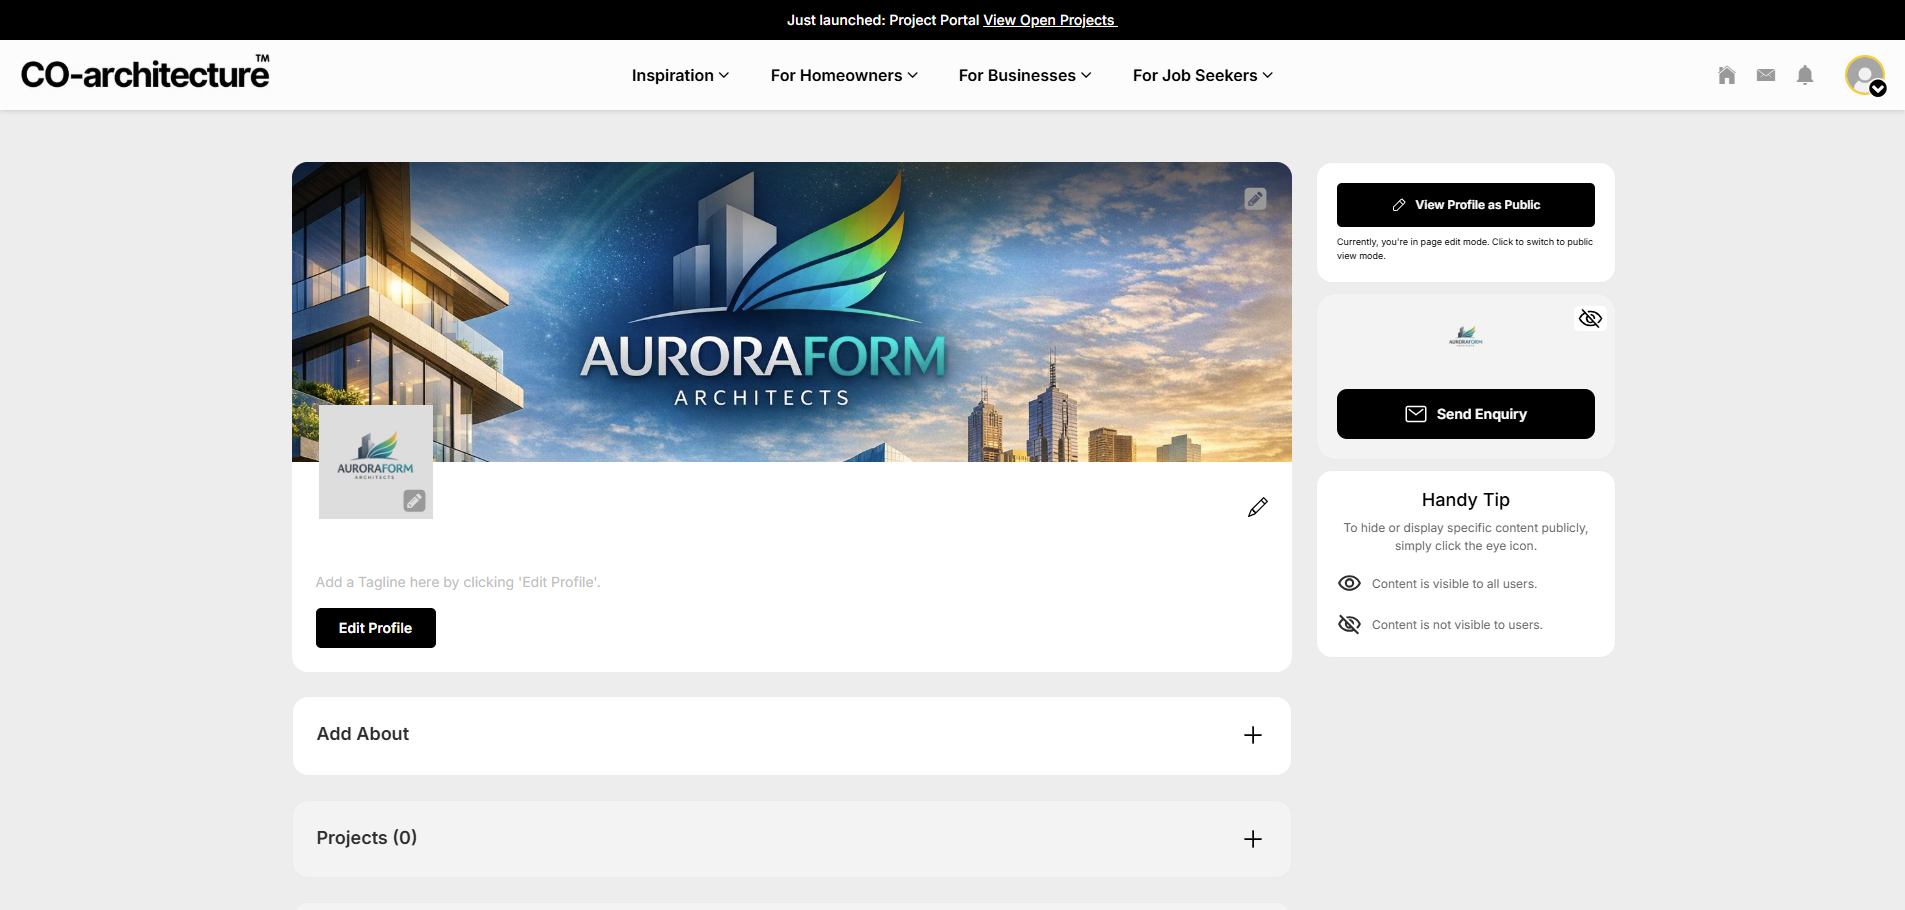
- Add a banner image that reflects your studio’s identity and helps your profile stand out.
- Banner images should be high‑resolution to avoid pixelation.
Adding a banner image is an important step in creating a polished and professional‑looking profile. A well‑chosen banner not only makes your page visually cleaner but also enhances how your studio appears when clients search for your business on CO‑architecture or through external search engines.
Business Information

- Click Edit Profile to edit:
- Business name
- Contact details
- Registration number
- Social links (website, LinkedIn, Instagram, Facebook, etc.)
- Include website and social media.
- Pinterest optional.
- Adding backlinks helps boost SEO.
About Section
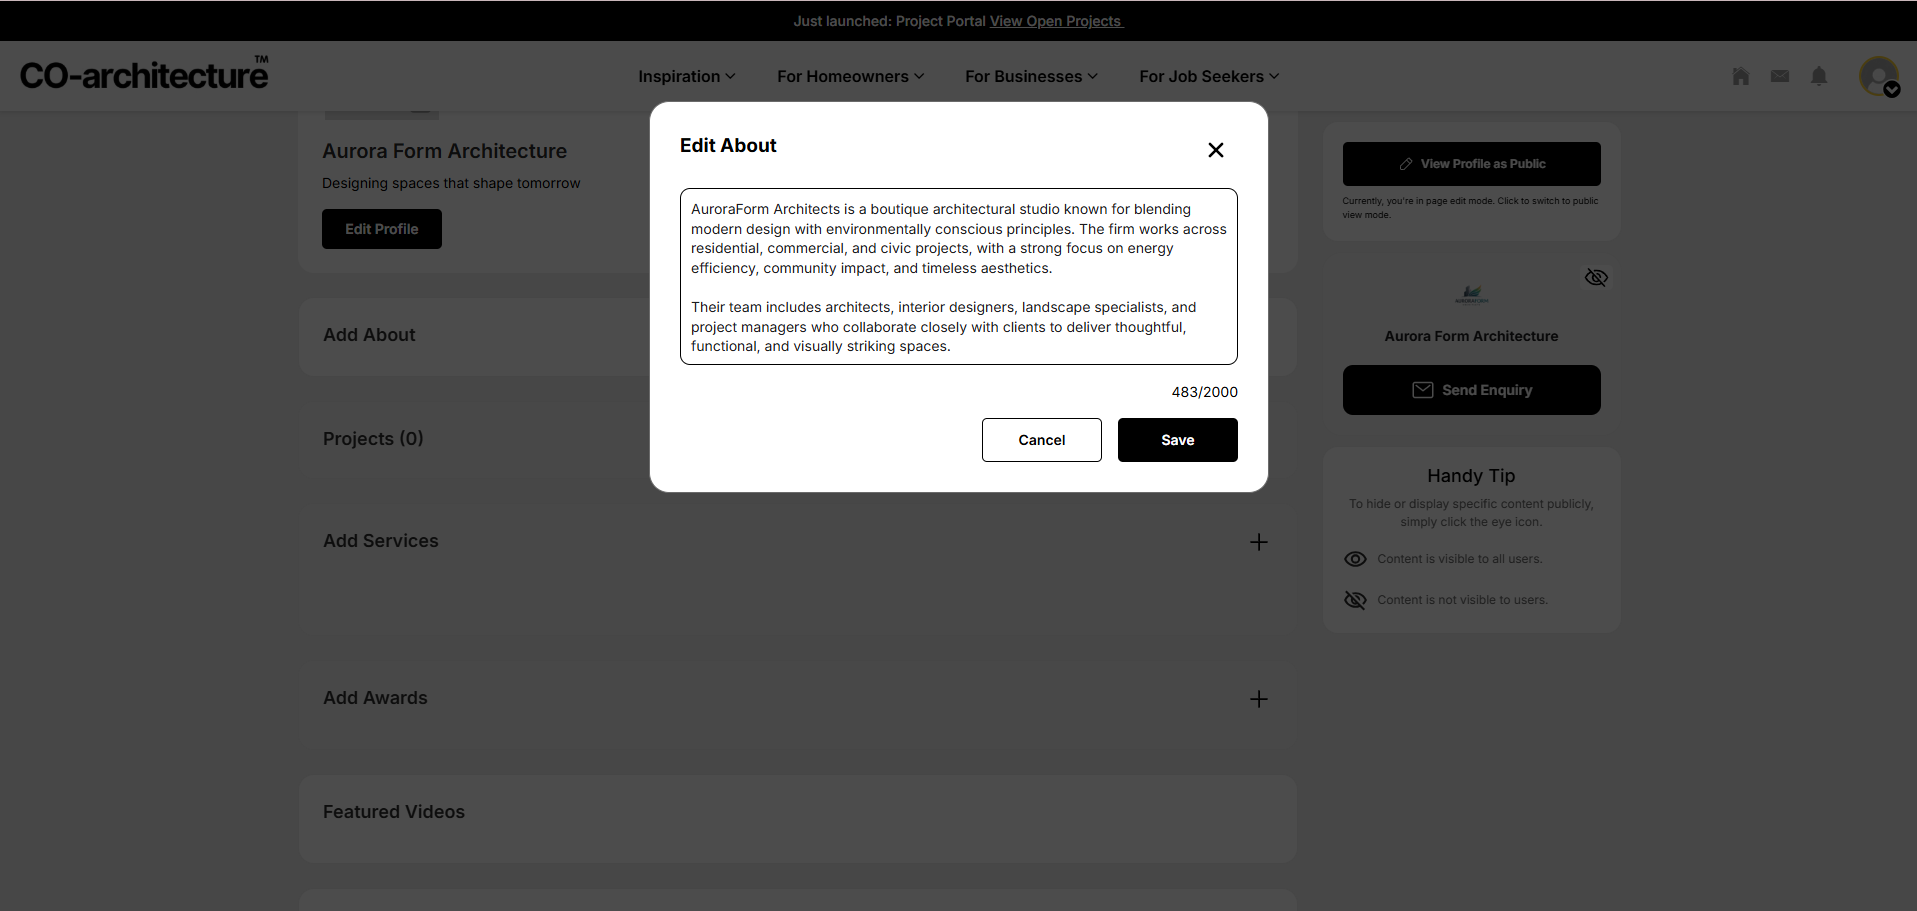
- Click Add About to create an overview of your company and click Save.
- First 4–5 lines display by default; users can expand to read more.
- Paragraph spacing is optional based on preference.
Still need a hand setting up your business profile?
If you’d like help refining your listing, projects, or team access, our support team can walk you through it.
Email our support teamUploading Projects
A strong project gallery sets you apart from competitors and reinforces your brand’s professionalism.
Starting a New Project
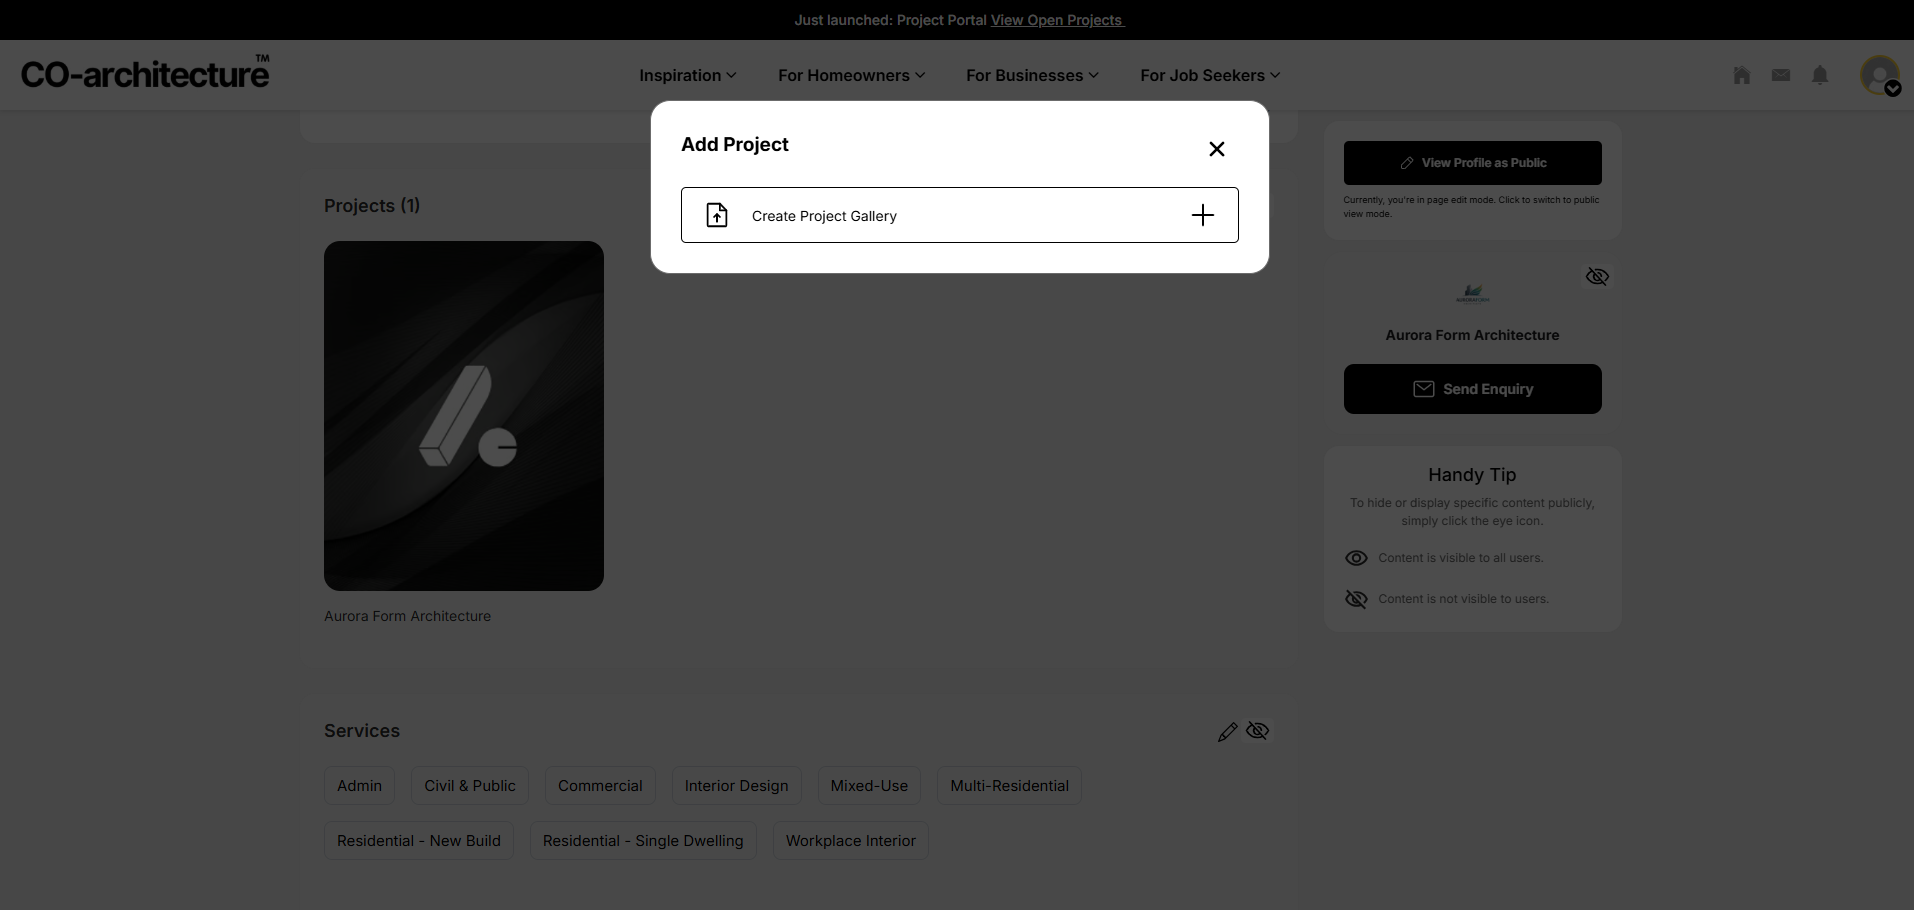
- Go to Projects → + Add Project
- Confirm creation of a new gallery.
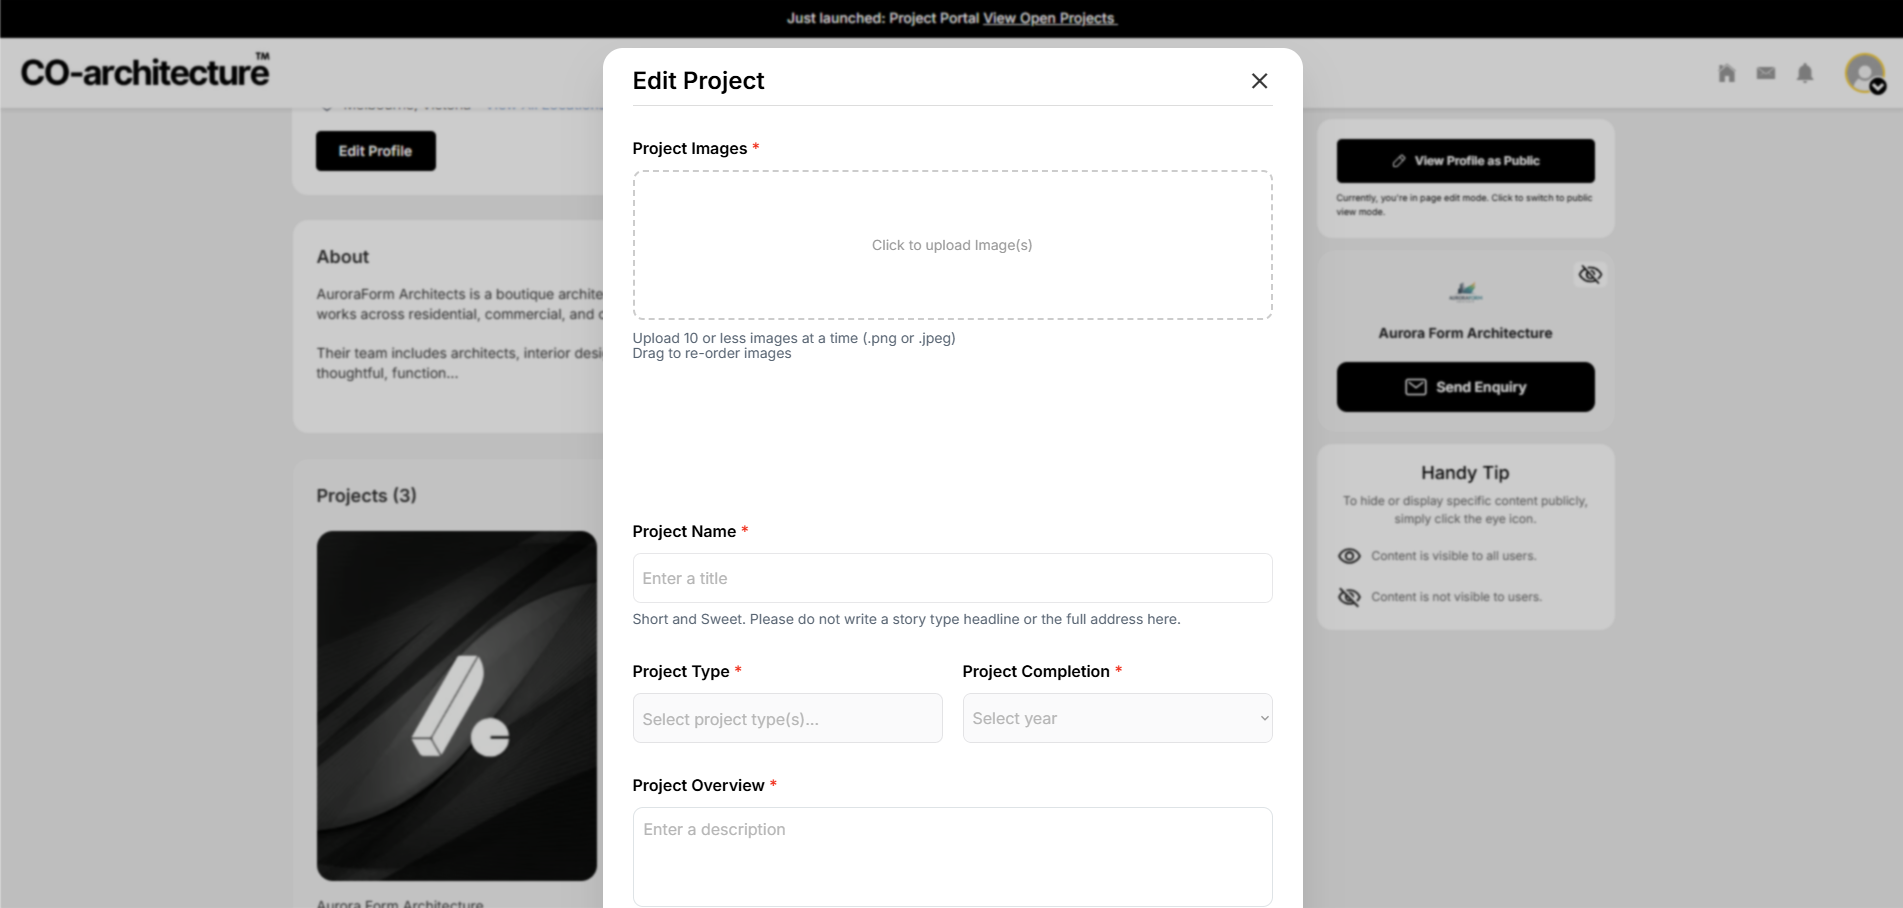
Images

- Upload PNG or JPEG files.
- Upload 10 images at a time for best performance.
- Add tags for each image.
- Select an image of your choosing to be set as a cover image.
Project Information
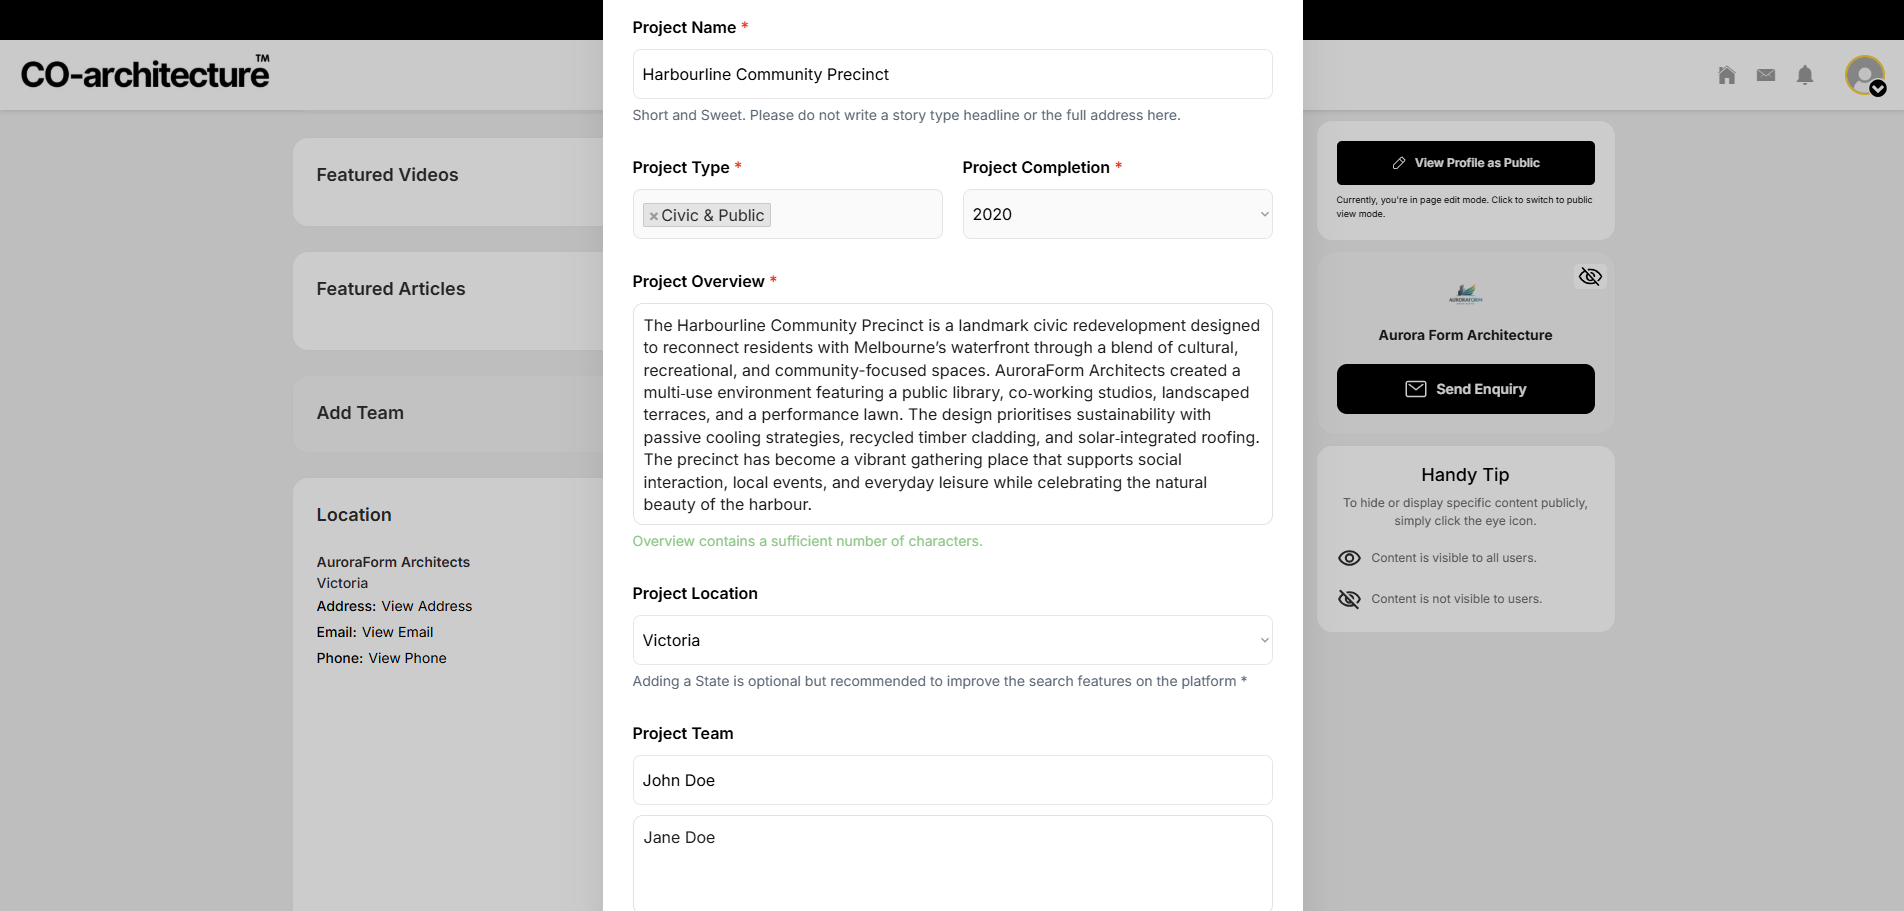
- Add the necessary information about your project, including:
- Project name
- Project type (e.g., residential)
- Year of completion
- Location
- Photographer credit
- Consultants (e.g., builder, interiors)
Project Approval Time
- Projects take 24–48 hours to appear publicly due to content review.
Once projects are approved:

- Projects appear in your profile in a Pinterest‑style layout.
- Related projects populate automatically.
- You can share project links across your own channels.
Still need a hand setting up your business profile?
If you’d like help refining your listing, projects, or team access, our support team can walk you through it.
Email our support teamServices & Awards
You can add in your services and awards to provide more information on your practice.
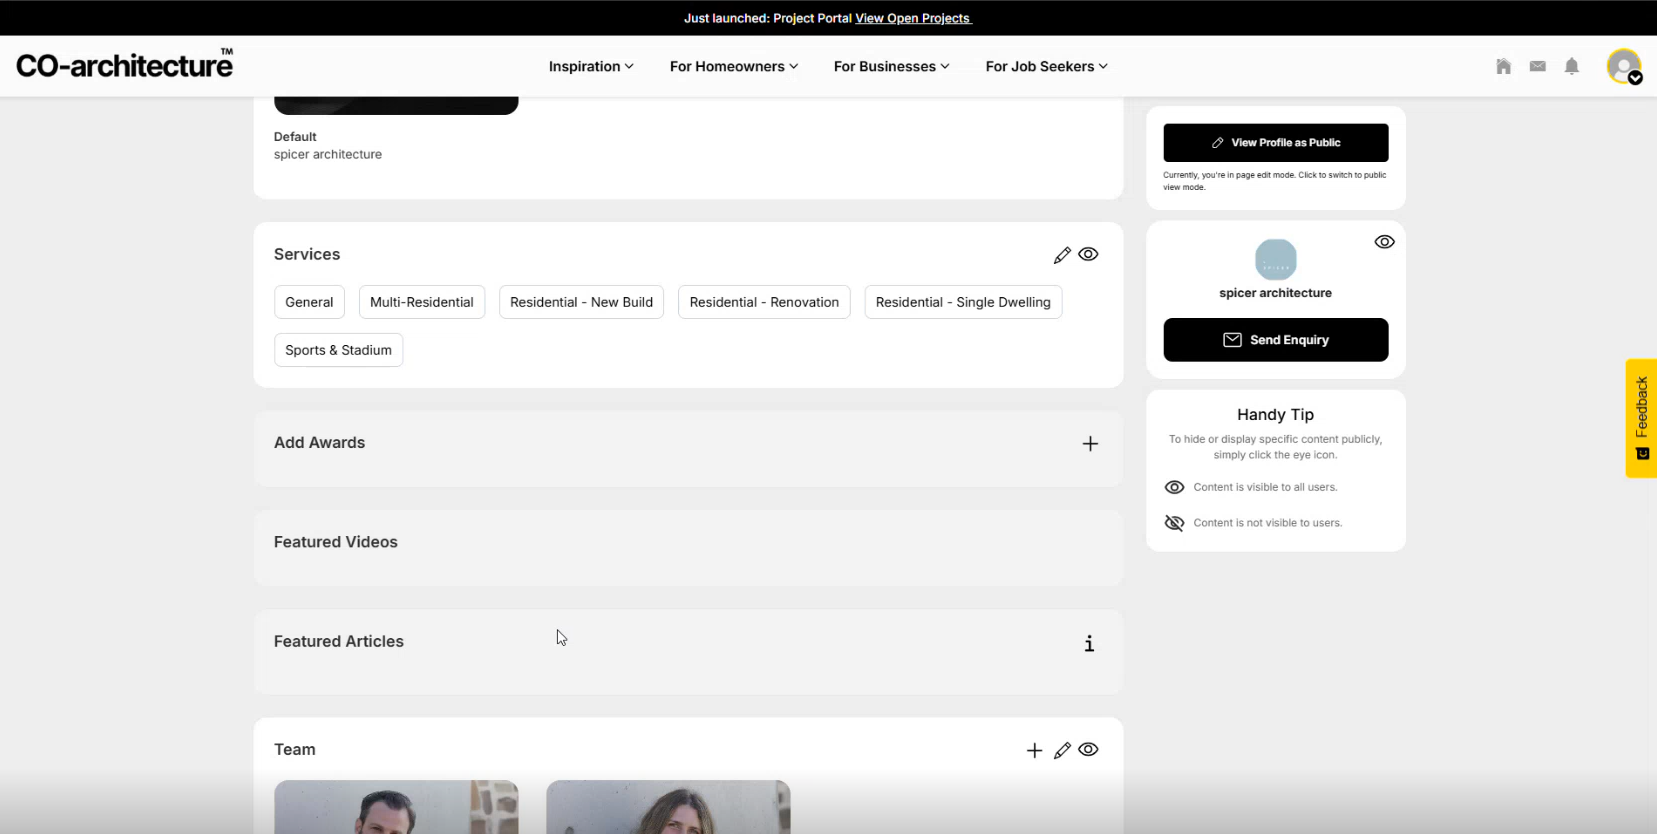
Services
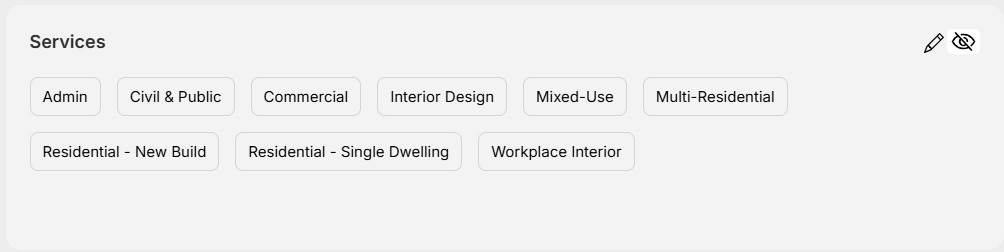
- Using the plus icon under the Services tab, add as many services as relevant.
Awards
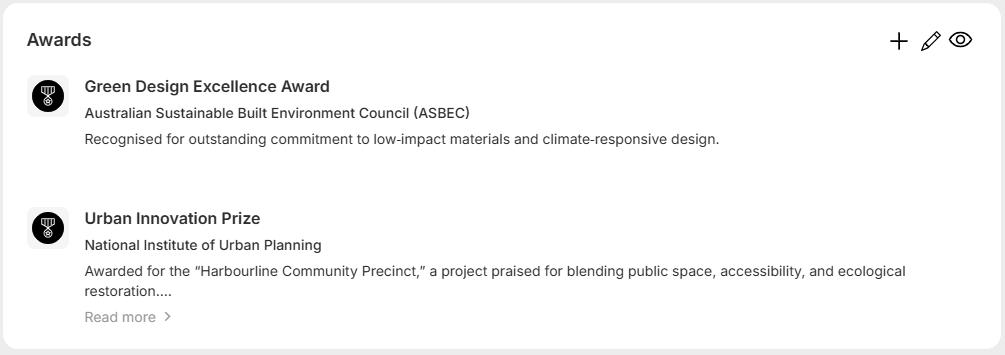

- Under Awards, click on the plus icon to add relevant awards your company has received.
- Adding more data on your platform helps with matching and search visibility
- Inlcuding your awards can also boost credibility and client trust.
Managing Team Members
This part covers the tools you need to maintain a well‑structured team, ensuring each member has the appropriate access and responsibilities within your account.
Adding Team Members
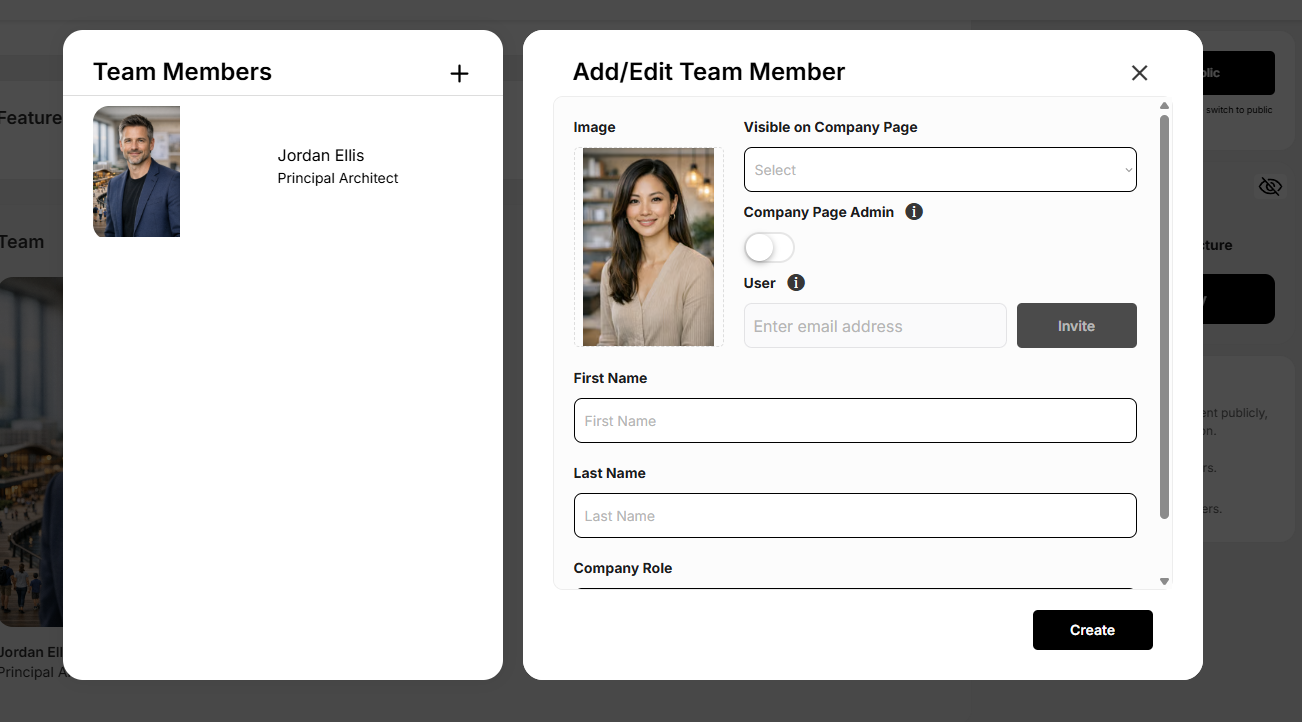
- Under the Team tab, navigate the plus icon and click to Add Member.
- Add the basic details of your team member.
- The Visible on Company Page dropdown allows you to show or hide a team member on your public profile.
Members do not need a CO‑Architecture account to appear as static profiles. However, an account will be needed to edit the page.
Inviting Team Members

Team members will only be allowed to edit once the invite has been accepted.
- Toggle the Company Page Admin button if you would like your team member to have editing permissions.
- Then, enter their email and click Invite.
Editing Team Members
Now that your team members are added, your page will look something like this. You can return to this section anytime to update or refine their details.

- Click the pencil icon on the top right hand corner of this section to edit.
- On the team member whose permissions you want to update, click the pencil icon.
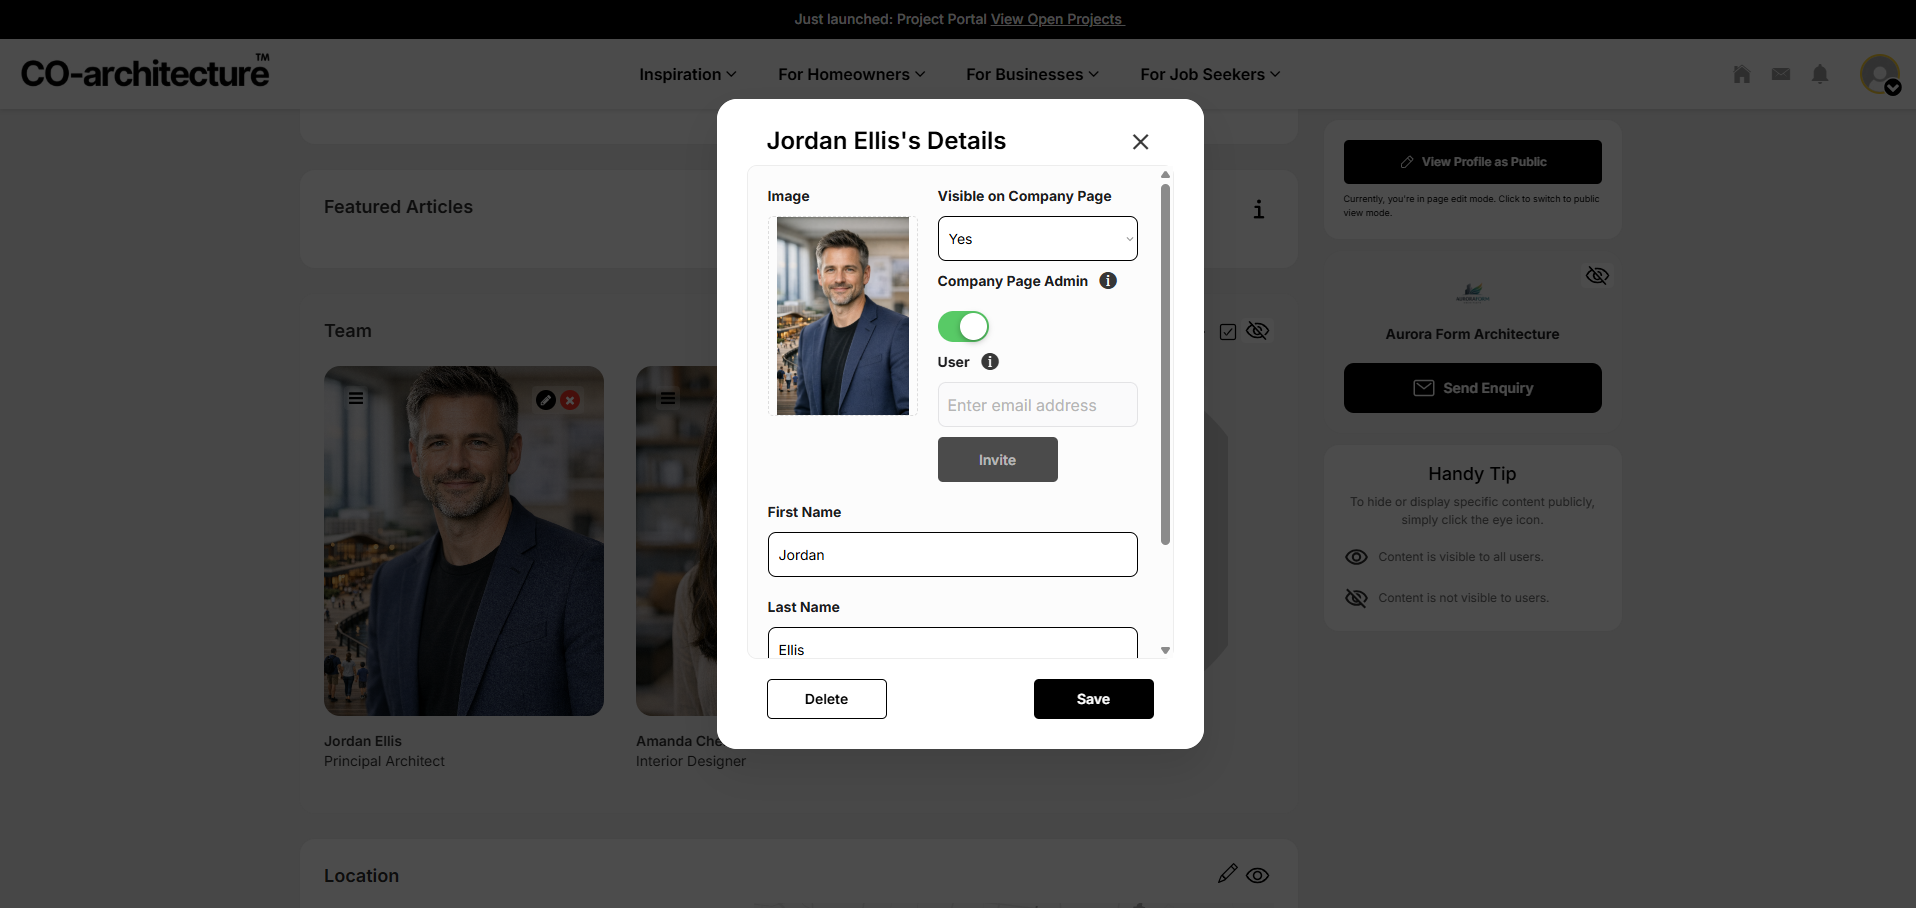
- Here you can make the necessary changes to your team member and click Save.
Still need a hand setting up your business profile?
If you’d like help refining your listing, projects, or team access, our support team can walk you through it.
Email our support team6. Location & Contact Details
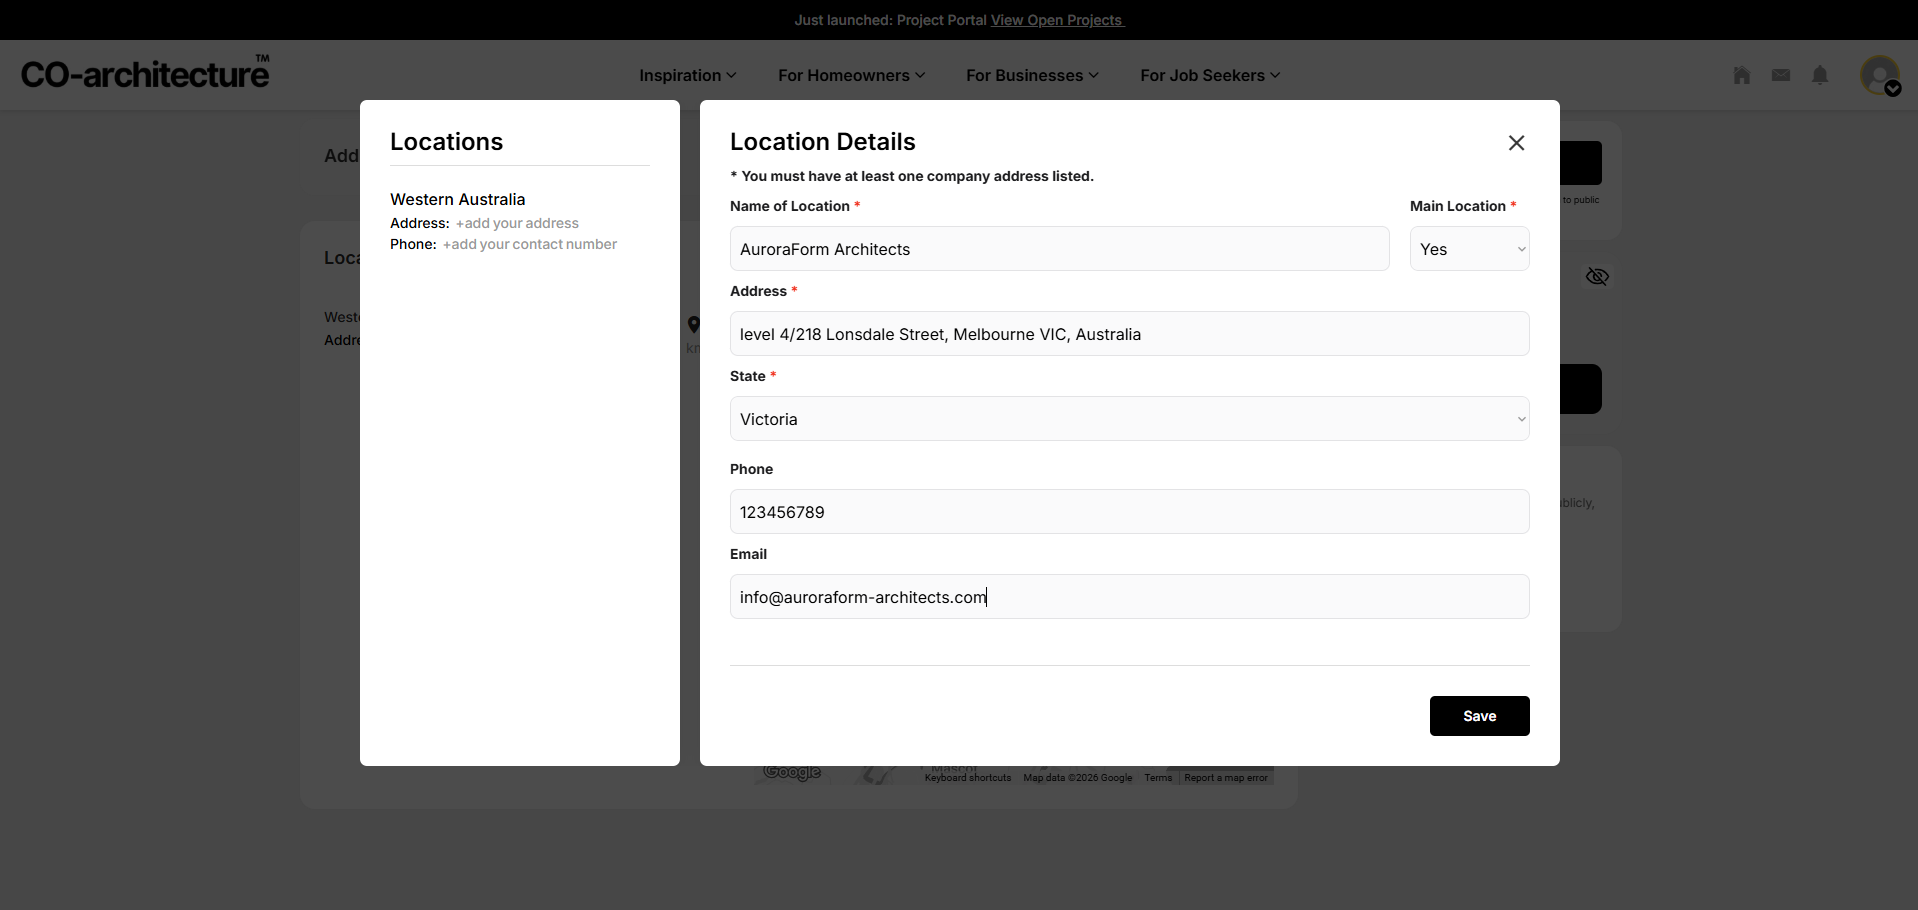
- Scroll down to the Locations tab to edit your location and contact information.
- Add multiple studio locations if needed.
- One location must be set as the main location.
- Keep NAP (Name, Address, Phone) consistent across platforms for SEO.
Having a consistent NAP helps with verification on Google.
7.Visibility
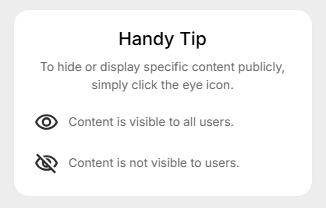
- Click the eye icon under any section you wish to make visible. e.g. the Location and Project section.
Still need a hand setting up your business profile?
If you’d like help refining your listing, projects, or team access, our support team can walk you through it.
Email our support team